NETGEAR(R) ProSafe(R) GS105E Ethernet Switch Review
About several months ago I was considering buying a new gigabit ethernet switch that has 5 ports (so it’s small enough to fit even on my desk). I already had an unmanaged switch at that time – a TP-LINK TL-SG1005D, 5-port gigabit ethernet switch, but as I was planning to put some devices in the lab, I need another switch to allow more devices get connected to the same network. I searched for gigabit switches on Taobao, and at some time this NETGEAR GS105E switch appears in my eye.
The NETGEAR GS105E is a 5-port gigabit managed ethernet switch, meaning that the switch can be configured in many ways. I bought it for ¥239 (about $35), and have been using it for a period of time. Nevertheless, I did not use the switch as my primary one, so I have no idea about the reliability of it. I think it’s just reliable because it’s from NETGEAR.
Appearance
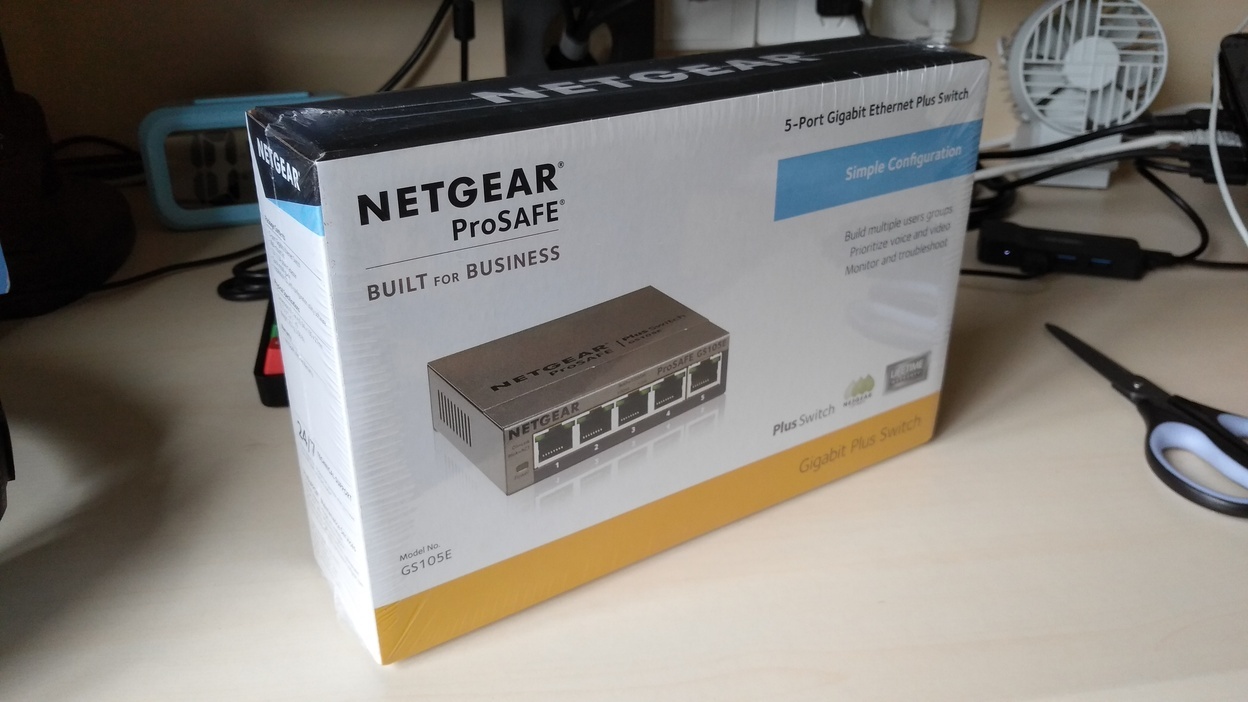
Figure 1. Front side of the box
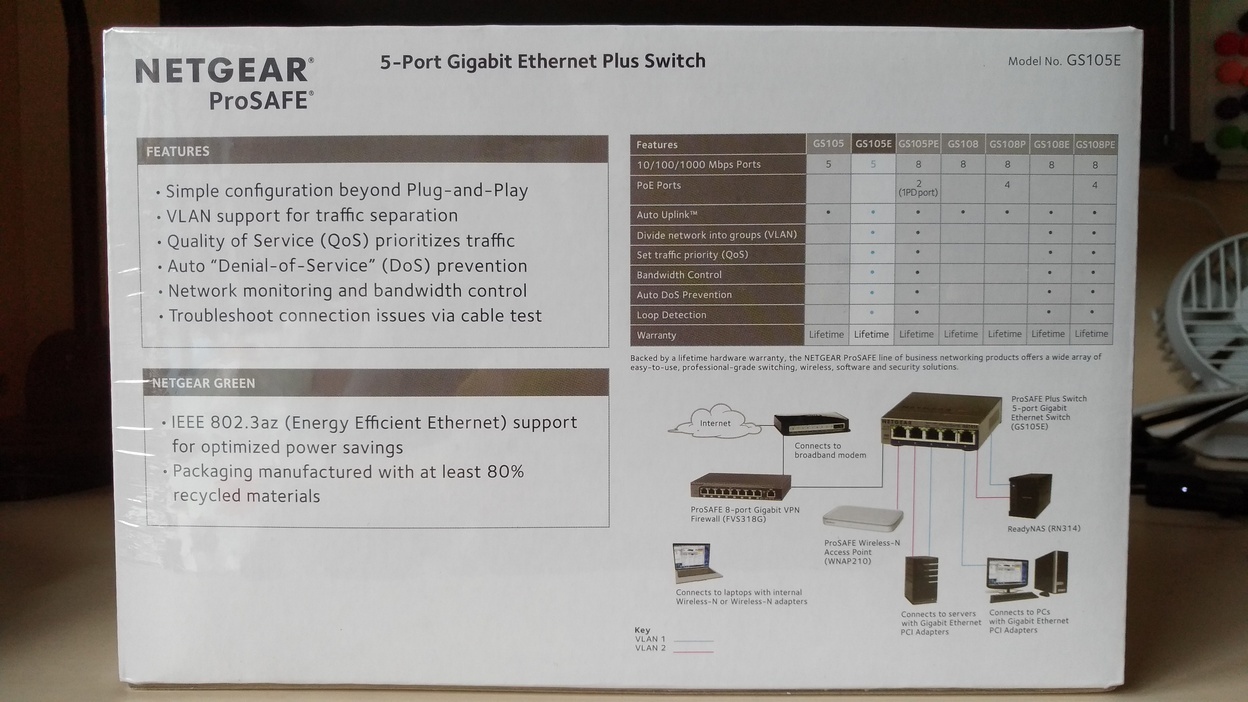
Figure 2. Back side of the box
NETGEAR GS105E does not seem to sell in mainland China1, so I have no idea why I can buy one. I guess it is originally sold in Australia, and is later shipped in mainland China with supplementary compliance files in the box.
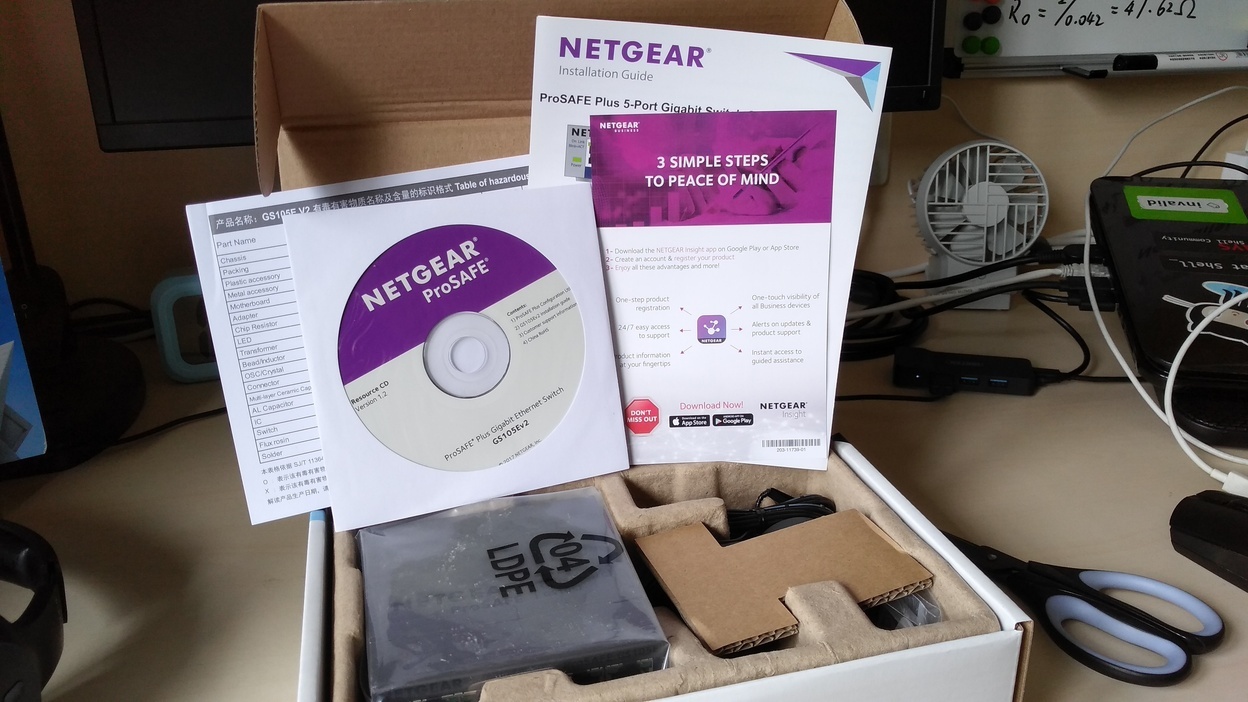
Figure 3. Contents of the box. All files are in English except the compliance files
The weirdest thing is the AC adapter. It’s a 12V 1A 2-pin plug, but in form of 3-pin socket, reversed direction. This means if we plug this into a socket, the wire does not go downward, but upward. I guess it is designed to be used on PDUs in data centers, where power sockets are mostly in 3-pin form, so no converter is needed. The 12V 1A output also means that power adapters for most networking widgets are compatible with the switch (instead of 9V, which is common among TP-LINK products).
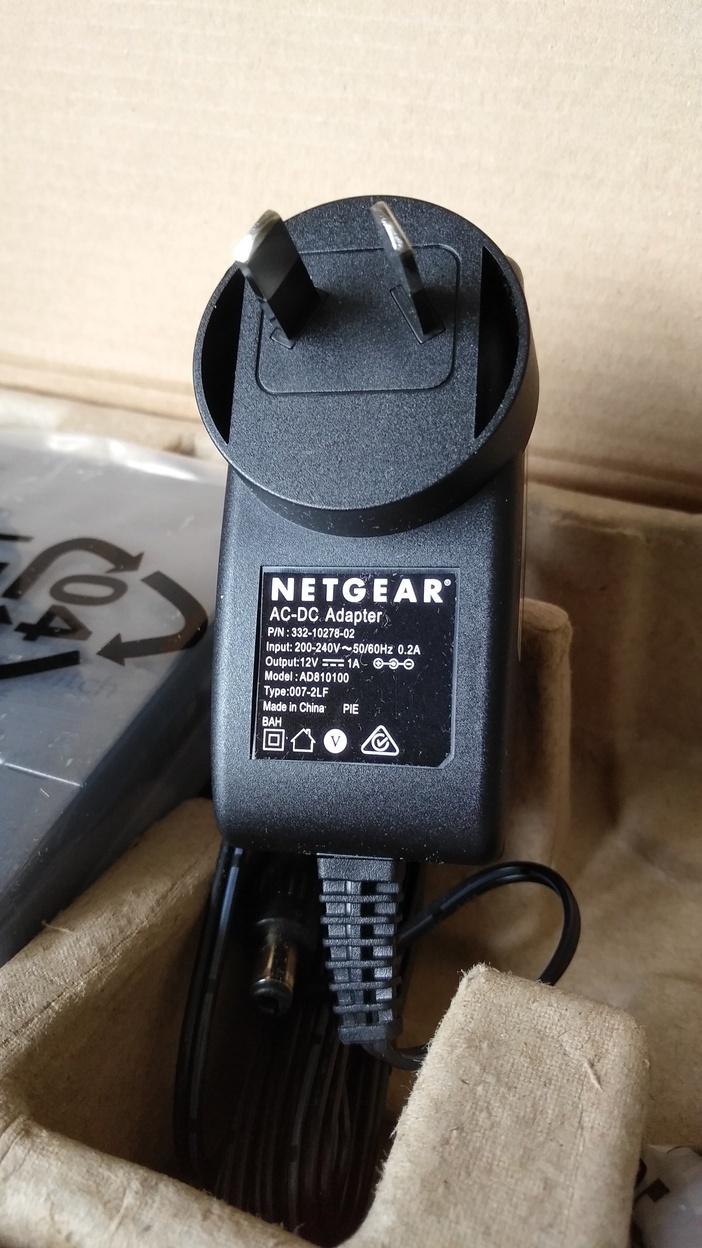
Figure 4. The bundled power adapter
A “mount kit” also comes with the switch. This is actually a pack of screw for people to hang it onto somewhere.
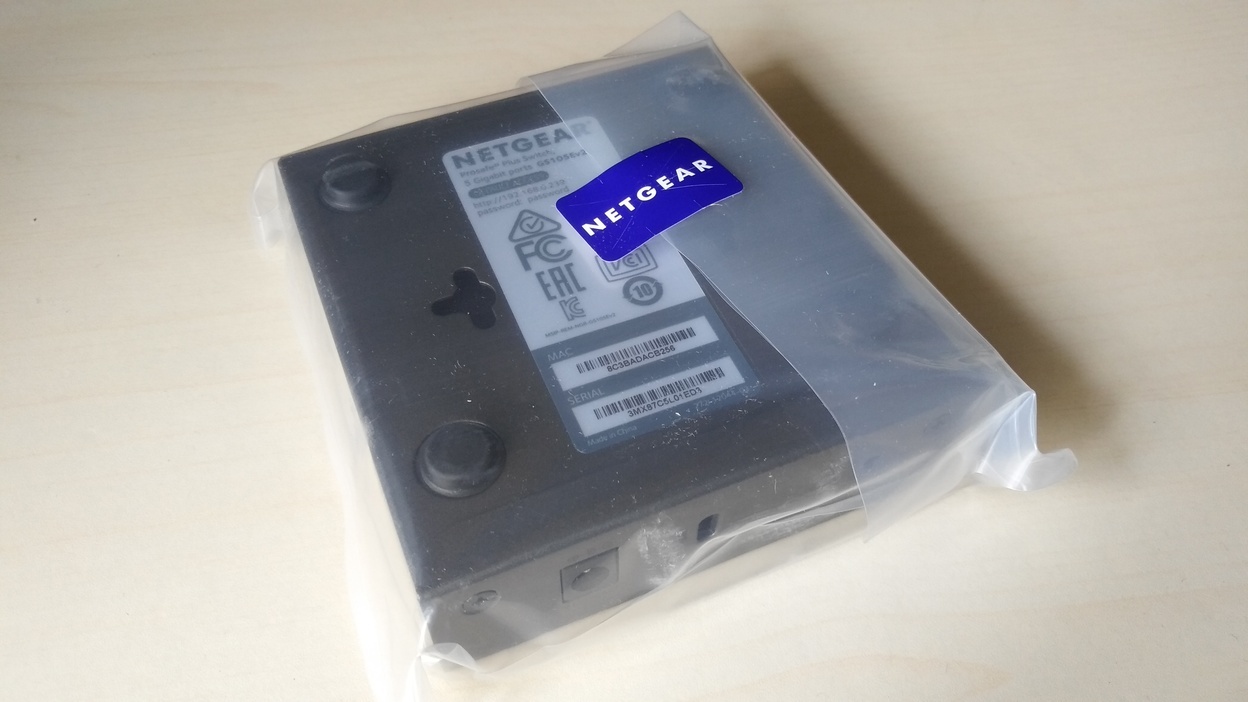
Figure 5. The back side of switch, where there are 2 mounting holes

Figure 6. Mount kit
The front side of NETGEAR GS105E is not as pretty as those TP-LINK SOHO switches. Instead, it targets professional use (although it is still suitable for home use2), so the front panel is more practical. Like most big switches used in data centers, there are two blinking LEDs for each port, showing the ethernet handshake status. This is useful if you are interested in it (I am)! :)
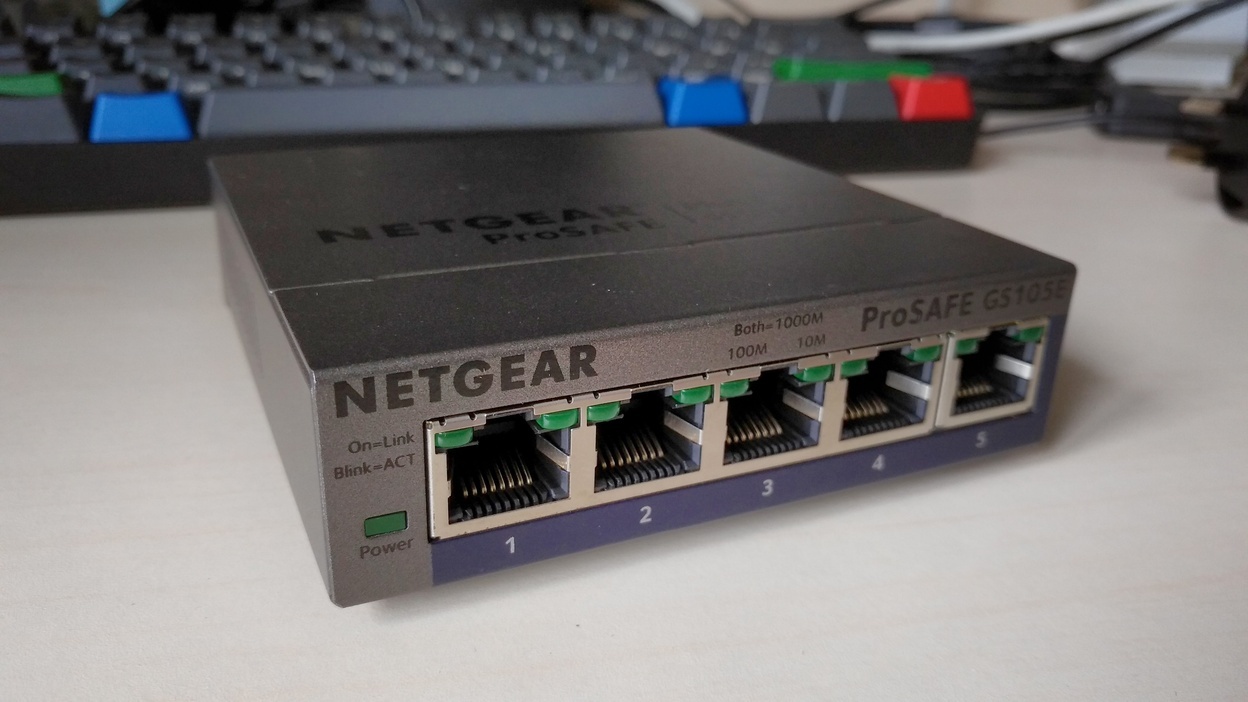
Figure 7. The front side of switch
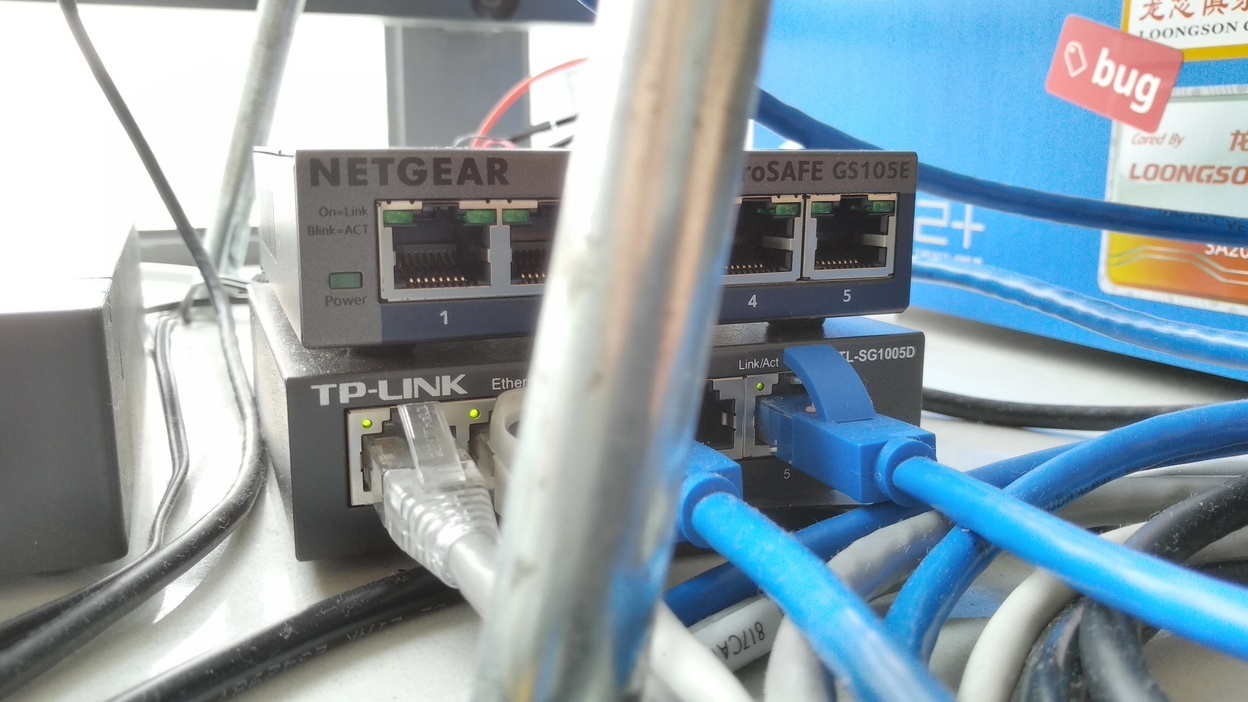
Figure 8. A NETGEAR GS105E placed on a TP-LINK TL-SG1005D
There is also a Kensington hole for locking the switch physically.
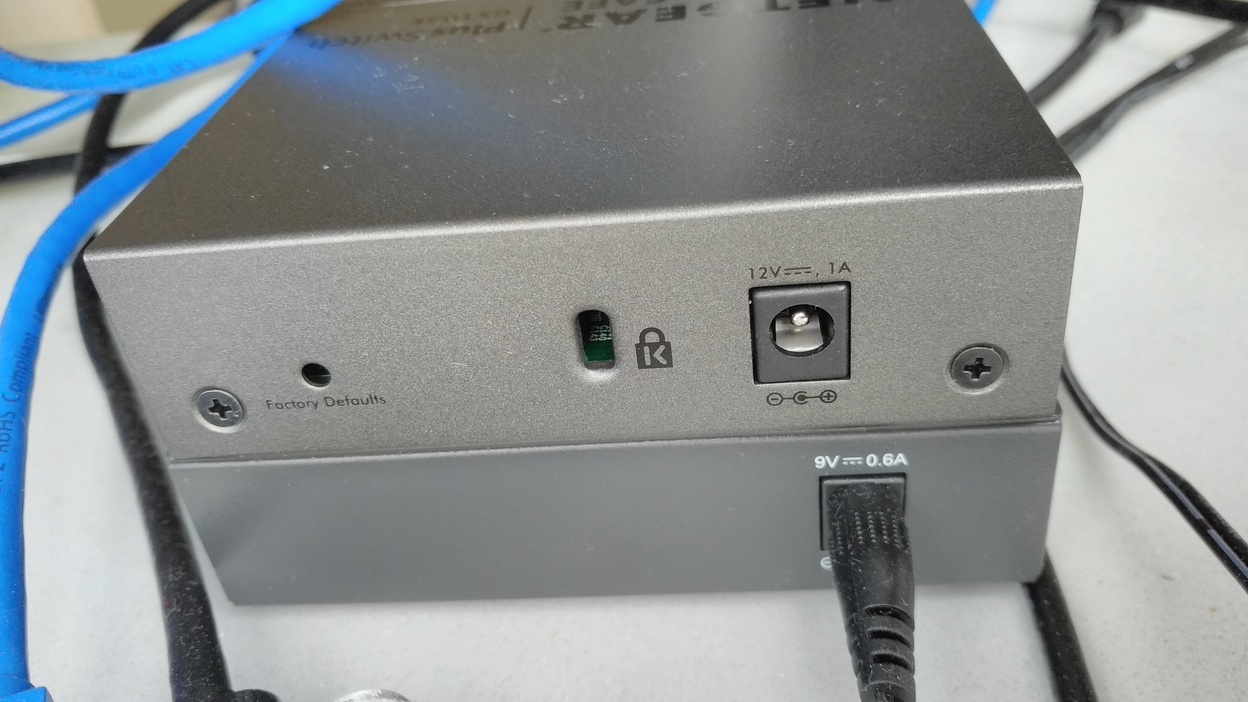
Figure 9. The Kensington lock hole
Disassembling NETGEAR GS105E is easy. Remove the two screws from the back side, and then the top cover can be uninstalled. Remove the two screws on the PCB, and PCB can be moved out of the metal case. This does not void warranty, since you don’t have the “void warranty if removed” stickers!
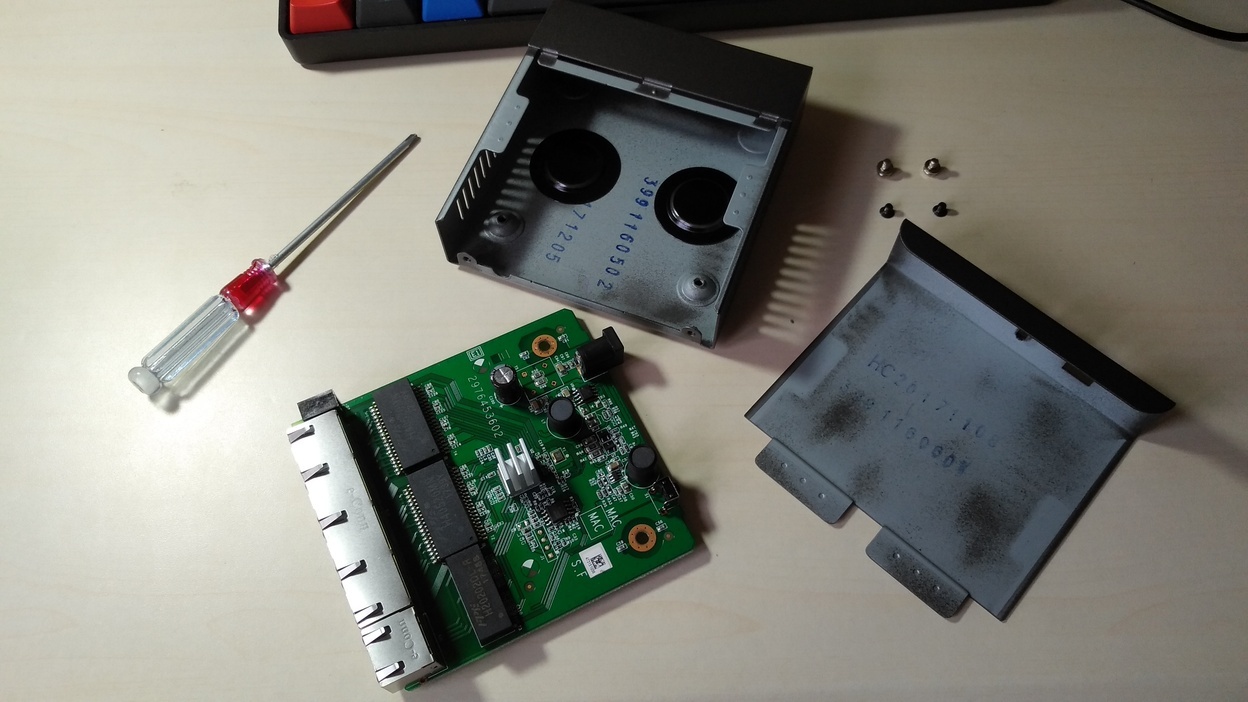
Figure 10. Disassembly of GS105E
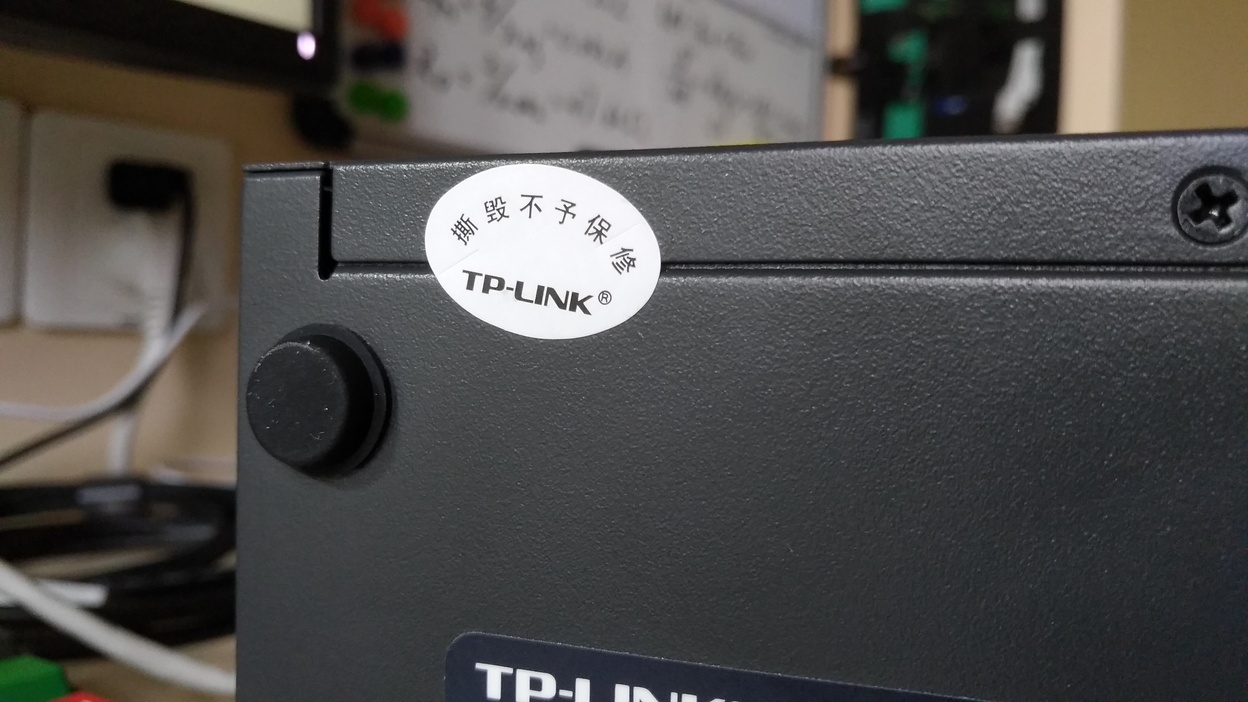
Figure 11. The “Void warranty if broken” sticker on my TL-SG1005D
Software
Let’s move to the software part. The selling point of NETGEAR GS105E is its simple management system; it enables a network administrator to perform advanced configuration on the switch, like VLAN and speed limit, easily.
GS105E supports two ways to configure it: via web interface or via the “ProSAFE Plus Configuration Utility”. I’ve never used the latter, so I will talk about the web interface here.
By default, GS105E listens on 192.168.0.239/24. Of course, you must be in the same subnet as GS105E in order to visit the switch, so the switch has the ability of performing DHCP to find out what subnet it is in, and adjust its IP address to that subnet (for example, in 10.2.4.0/24 subnet, it should be accessed with 10.2.4.239). This is not enabled by default, so you need other ways to access it first to enable it (see below). Unfortunately, even it’s turned on, it does not always work. At least for me it never works, until I entered the web interface and manually choose “Refresh DHCP”. I have no idea why.
Another way (and is likely the recommended way) is to manually assign a 192.168.0.0/24 IP for the device first. Pay attention that if you use this way, then a router had better not connect to the switch since the packet may be forwarded to the router (how stupid)!
The switch will try registering itself to NETGEAR on first use. If you are in mainland China this is impossible to success, so you need to manually register it on NETGEAR. In this way, the web interface will know it has been registered and stops prompting you again and again about the failure of register. (Why?)
VLAN
To configure VLAN, select “VLAN” on the top bar. NETGEAR GS105E supports two modes of VLAN: Port-based and 802.1Q-based. If you do not have multiple switches stacked together, then they do not make much difference; often port-based configuration will be better.
Port-based VLAN is simple to configure, and I think it suites most home and lab use cases. The “Basic” profile allows you to bind ports to VLANs, but only one VLAN can be bound to one port at the same time. The “Advanced” profile allows you to bind multiple ports to multiple VLANs, so there can be multiple “layers” of VLANs. This is the same for 802.1Q-based configuration.
For 802.1Q-based configuration, there are differences between “tagged” ports and “untagged” ports. Simply speaking:
- “Tagged” port is used to connect other (stacked) switches
- “Untagged” port is used to connect general devices
In most cases, you want “untagged” ports. This is why I say in most cases, port-based and 802.1Q based configuration make no difference. The raison d’être of 802.1Q is to allow stacked switches; a “tag” is marked on the package for identification across switches, and general NICs do not recognize it.
Loop Detection and Broadcast Filtering
In “System” > “management” > “Loop Detection”, one can enable loop detection, so that when a loop forms in the network, the switch will blink the LEDs on that two ports. However, this does not prevent broadcast storm. If a cable is connected to two of the ports on the switch, the LEDs will blink; but when a broadcast package is going through the switch (for example, ping 192.168.0.255), broadcast storm happens, and the switch will die, until the loop disappears.
Nonetheless, broadcast storm can be prevented with broadcast filtering, which is in “QoS” > “Broadcast Filtering”. If the “Storm control rate” is set below 16M, broadcast storm will not happen even if there is a loop. When the rate is set larger than 32M, the broadcast storm will still happen.
Conclusion
I must say it is a little bit surprising for me that a managed switch can be bought in such a low price. Indeed, most people don’t need managing in their switches – switches are plug-and-play in most cases. But for some tech-savvy users, they may still want a managed switch that can configure VLAN or something else, while keeping the size of switch not too big. From my perspective, for those who want advanced switches in their home, domitory, or lab, NETGEAR GS105E is absolutely a good choice.
Notes
-
On datasheet for NETGEAR Gigabit Ethernet Smart Managed Plus Switches page 10 “Ordering Information”, there is no “China”; only GS108E has. Since Australia uses the same plug as China, I think GS105E is most likely sold in Australia first. ↩
-
Also on the datasheet, page 9 “Technical Specifications”, “Electromagnetic Emissions and Immunity Certifications Class” for GS105Ev2 is “B” (stricter than “A”), meaning that GS105E is suitable for home use. ↩